Microsoft Virtual PC (MSVPC) 2007 does not support DOS operating systems including Windows 3.x and Windows 95. DOS must be installed as an OTHER operating system but requires DOS VM Additions for mouse support, CD-ROM support, extended memory management, file sharing between the client / host, and IDLE.COM to handle idle time in DOS.
DOS VM Additions can be installed manually from two sources:
A) Locate and download MSVPC 2004
- After downloading, extract the DOS Virtual Machine Additions virtual floppy disk, DOS Virtual Machine Additions.vfd , included in the installation package.
or
B) Locate DOS Virtual Machine Additions in the Microsoft Virtual PC installation directory
- Most likely, MSVPC is installed at, C:\Program Files (x86)\Microsoft Virtual PC
- Under the directory, C:\Program Files (x86)\Microsoft Virtual PC\Virtual Machine Additions, find the ISO file, VMAdditions.iso
- Open VMAdditions.iso (with 7-zip or another similar file archive software package). It contains a DOS directory with five files.
- Create a virtual floppy disk (with a floppy disk image creator software package) with a directory named SRCFILES.
- Copy the below five files to directory, SRCFILES, to the virtual floppy disk image file:
- MOUSE.COM
- VMADD386.SYS
- CDROM.SYS
- FSHARE.EXE
- IDLE.COM
- At this point, an img or flp file has been created as a virtual floppy disk
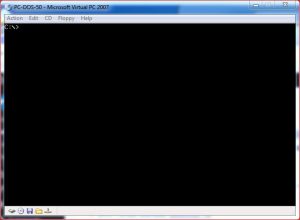
1) Start the DOS 5 VM from the MSVPC console. The following DOS command window will appear.
2) Capture the DOS VM Additions virtual floppy (created above) using the menu bar –
Select Floppy >> Capture Floppy Disk Image.
3) At the DOS prompt, create a new directory on drive C: named, VMADD, using the below command:
C:\>md c:\VMADD
4) Copy the five files from drive a: to c:\VMADD. At the DOS prompt, issue each of the following commands:
C:\>copy a:\SRCFILES\MOUSE.COM c:\VMADD
C:\>copy a:\SRCFILES\VMADD386.SYS c:\VMADD
C:\>copy a:\SRCFILES\CDROM.SYS c:\VMADD
C:\>copy a:\SRCFILES\FSHARE.EXE c:\VMADD
C:\>copy a:\SRCFILES\IDLE.COM c:\VMADD
5) Locate and download the file mscdex.exe to provide CD-ROM access from DOS. Create another floppy disk image that solely contains mscdex.exe. Capture the floppy disk image and copy to the DOS directory (assuming DOS is stored at c:\DOS)
copy a:\mscdex.exe to c:\DOS
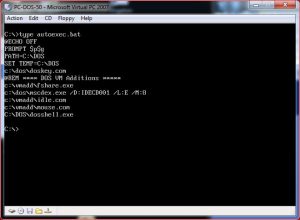
6) Modify c:\autoexec.bat as shown below:
Add the below lines to the end of autoexec.bat (before the DOSSHELL.exe command)
@REM **** DOS VM Additions *****
c:\vmadd\fshare.exe
c:\dos\mscdex.exe /D:IDECD001 /L:E /M:8
c:\vmadd\idle.com
c:\vmadd\mouse.com
Final version example of autoexec.bat.
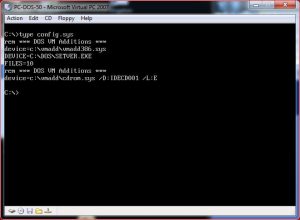
7) Modify c:\config.sys as shown below:
Add the below 2 lines at the start of config.sys:
rem *** DOS VM Additions ***
device=c:\vmadd\vmadd386.sys
Add the below 2 lines at the end of config.sys:
rem *** DOS VM Additions ***
device=c:\vmadd\cdrom.sys /D:IDECD001 /L:E
Final version example of config.sys.
8) Reboot DOS-5 VM from the main menu bar
Action >> Reset
9) After reboot, DOS Shell is displayed. Note mouse (block cursor) and CD-ROM (drive E:) support.
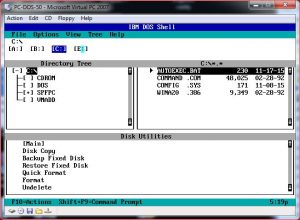
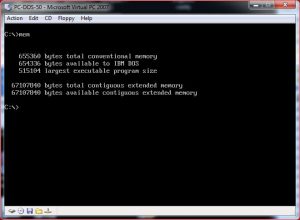
10) After new software and drivers are loaded into memory, DOS-5 has approximately 515MB in memory for program execution.
Enjoy your DOS-5 VM!